
Camper RV LED Strip Lighting Installation
LED strip light installation in a 2010
Keystone Outback Travel Trailer Camper RV, Page 4.
This is the final page describing the camper-RV LED light strip installation.
Click on any image for a larger view.
Every pic is explained below the relevant picture.
 The final step of the camper/RV LED light strip installation
was to decide where I wanted the LED light strips on the ceiling.
I decided on a long strip from side to side, a short
strip on the side at the ramp door entrance, and a
short strip on the side at the back of the room.
These locations allowed me to tap into the ceiling
lights that were already there, thus operating the
LED light strips via the ceiling fixture switches.
 I cleaned off the path on the ceiling for
the LED light strips with rubbing alcohol.
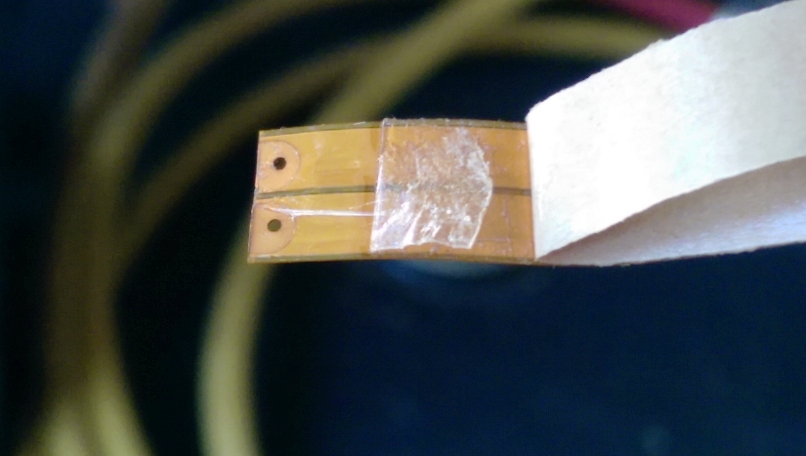
Then I peeled back the paper covering the adhesive,
and then the plastic covering on the end of the strip (above)…
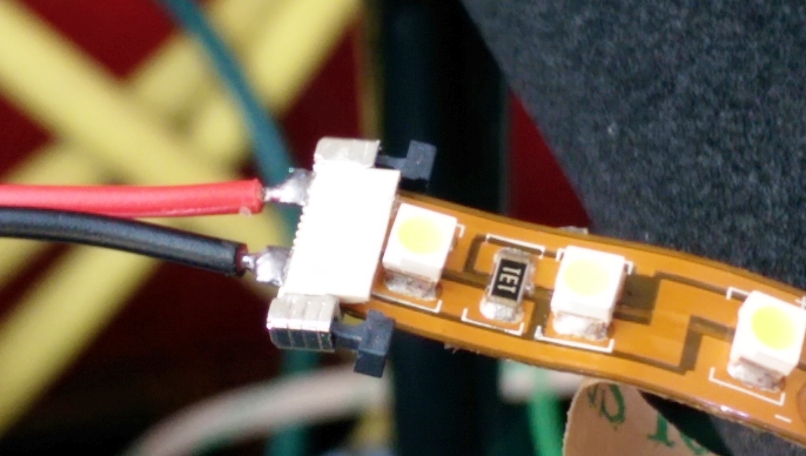 Then I put on the connector onto the strip.
Those black tabs on the connector snap downwards,
locking the connector on to the LED light strip.
 In the pic above you can see where I applied
the longer LED light strip from one side to the other.
I didn’t use a guide, which I should had, because
you can surely see how it’s not a straight line.
It will work ok for me though, but if it bothers
me ‘too’ much then later on I’ll take it down
and put it up straighter, even if I have to adhere
it to the ceiling with glue.
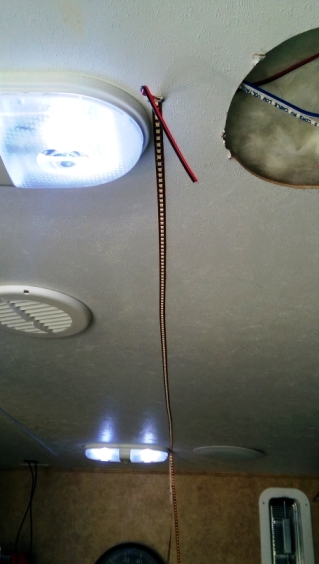
I tapped into the fixture closest to you for power,
using the fixture switch for on/off functionality.
The tape was just to hold it securely while I put it up.
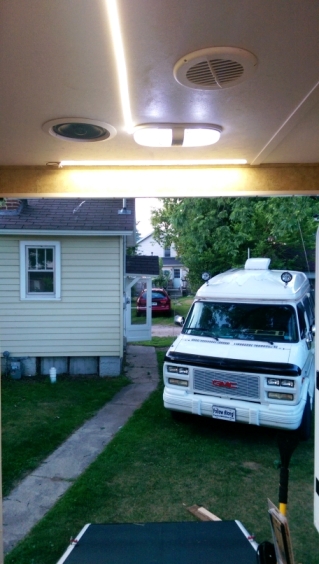 Here you see the small LED light strip at the ramp door entrance.
This too was wired into the ceiling fixture which I mentioned above,
and so when I turn on the fixture via its switch, I get lighting
from the 2 LED bulbs in the fixture, the long LED light strip
going across the room, and the short strip by the ramp door.
In the pic above you see them all lit up.
You’ll also not that the speaker has been reinstalled.
That there is my GMC camper van that I’ll be pulling
this 2010 Keystone Outback with by the way.
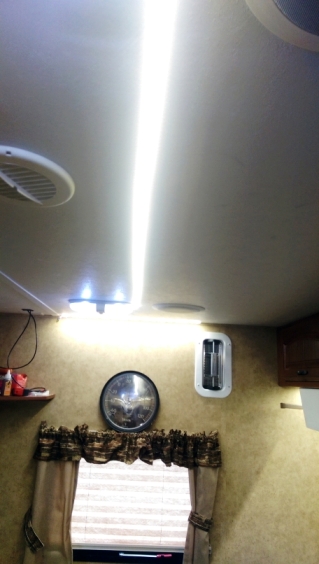
 In this pic above you see the last short LED light strip in the back.
This is wired to the back ceiling light fixture,
so that fixture controls the lighting for the fixture’s
2 LED bulbs and also the short LED light strip in the back.
Note that the map board light is on as well in this pic.
Also note how dark that map board is because it’s black.
 So, even though there would be maps on the map board,
thus not really making the black backing an issue,
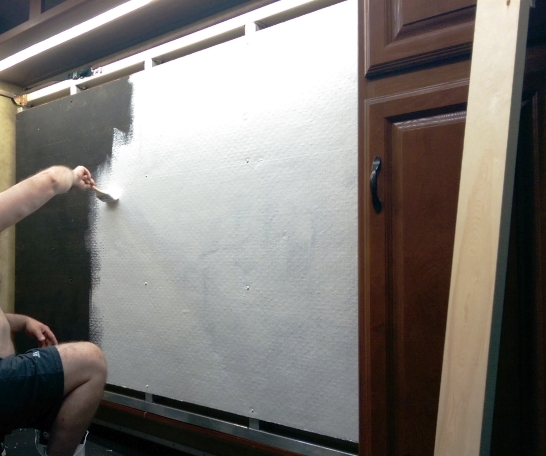
I decided to paint the map board white anyway.
I just figured it would look better when bare,
and in any areas where a map wasn’t covering it.
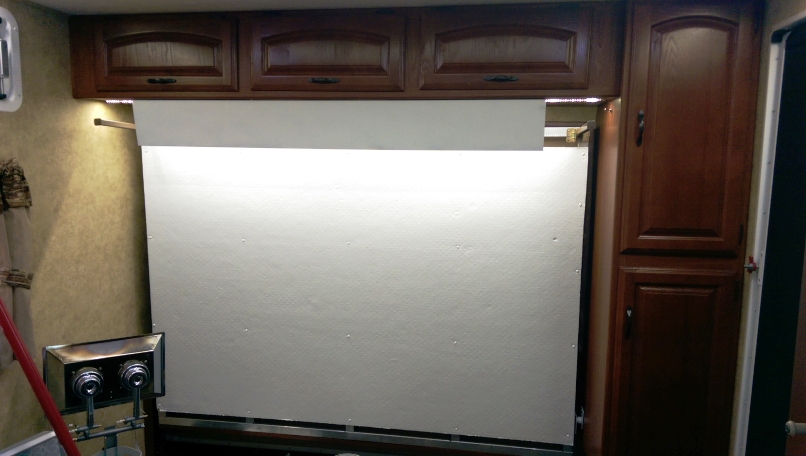
 Here is a pic after applying the first coat.
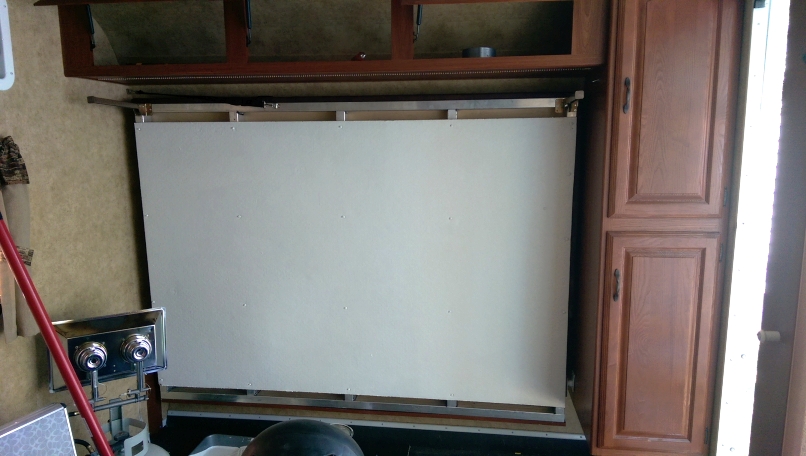 And here is a pic of the map board after a 2nd coat.
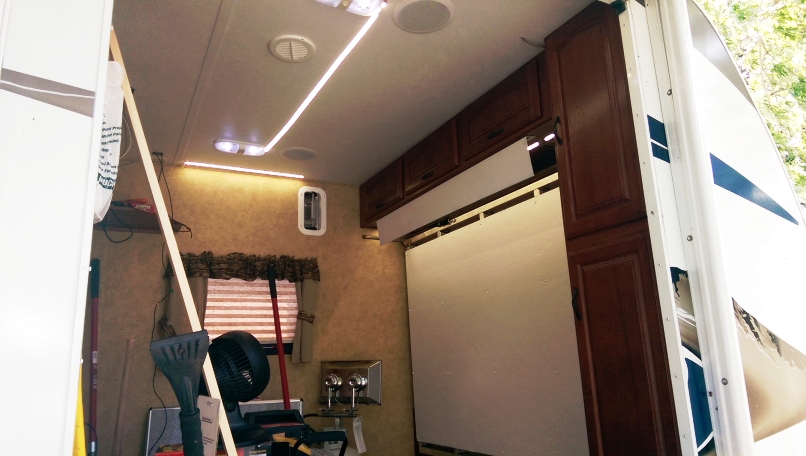
 I wanted a defector because the map board
LED light strip is right at my eye level.
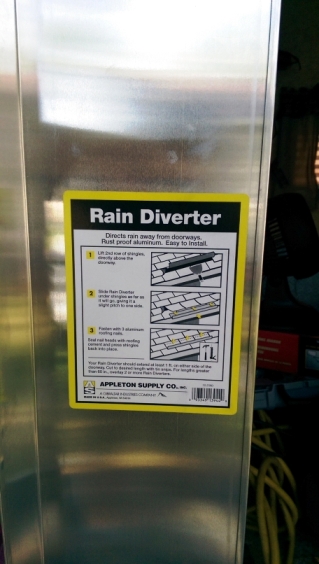
I came across this aluminum rain diverter shown above.
 Another view of the rain diverter.
It’s L-shaped, thus providing a mounting lip.
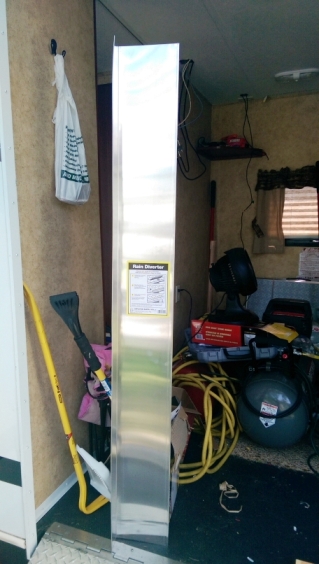
 Here above you can see that I painted the outside of the rain diverter white.
This is for the outside view… for esthetics.
The inside was left bare aluminum for reflective properties.
I applied 3 coats of spray paint to it.
 Here above you see the rain diverter installed.
Was easy to screw on, works great, and reflects well.
I will, however, later remove this reflecter and have
a metal shop bend over the downward lip as it is too long.
I think I’ll only need about 2/3s of the current height.
 Another view of the map board and reflector.
 And another view of the camper-RV LED light strip installation.
END OF PROJECT — FINAL PICTURES
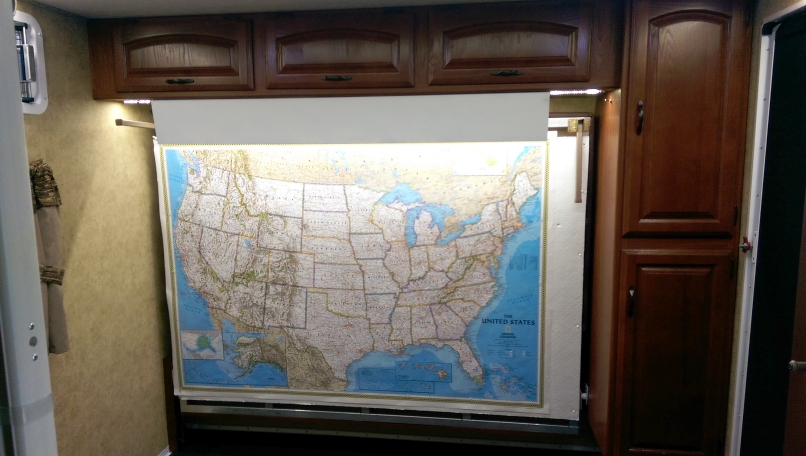
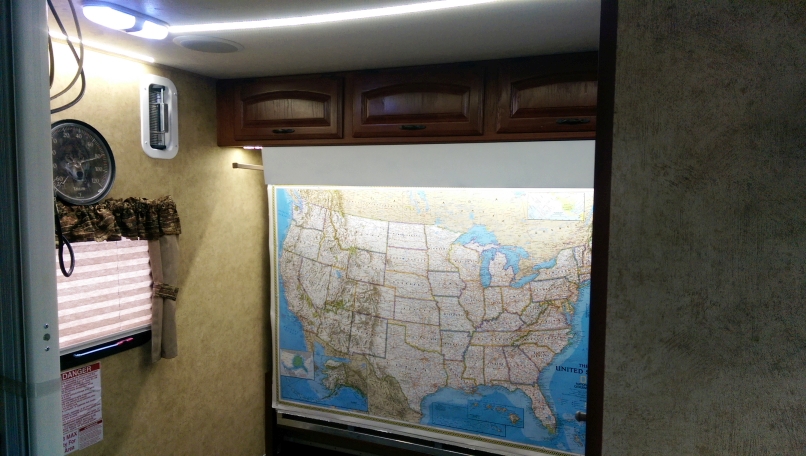 Map board with a 48″ X 70″ United States National
Geographic Reference Map, as viewed from the galley.
I’ll overlay this map with print outs from Google Earth.
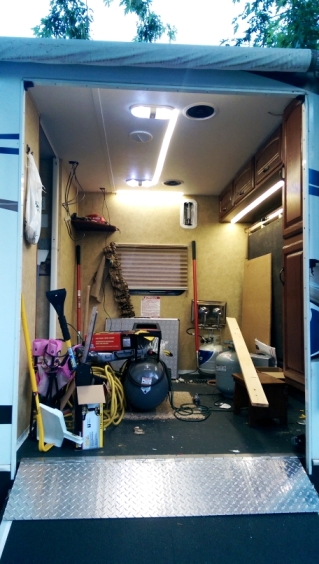
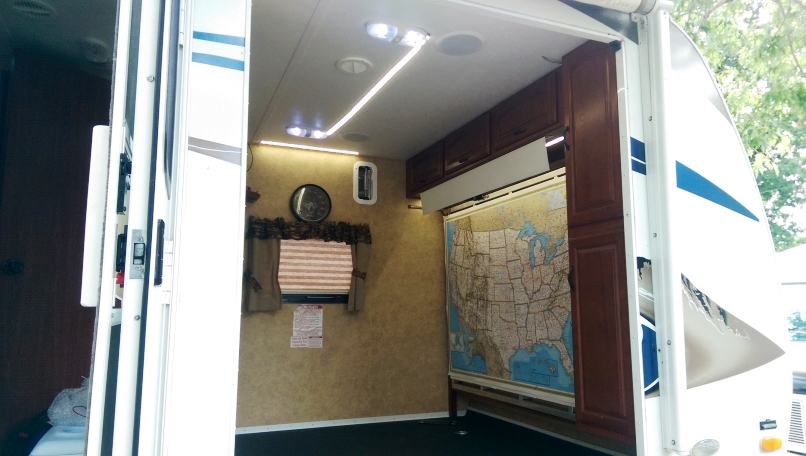
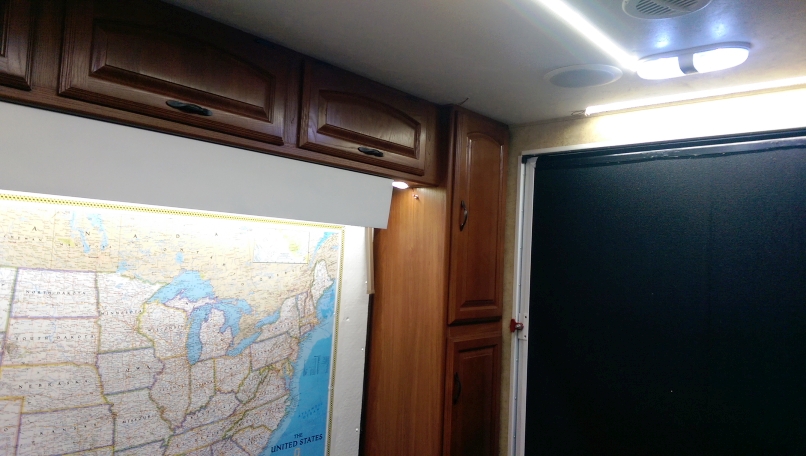 Another view, from inside the cargo bay.
Errr… umm… from inside the OPERATIONS ROOM! 🙂
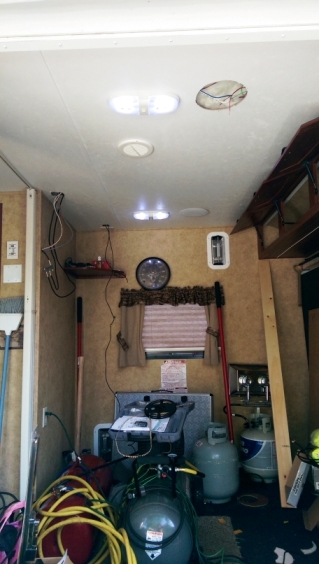
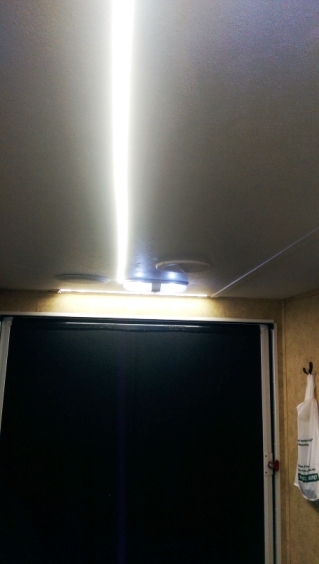 View of ceiling LED strip lighting
from back of room to cargo ramp door.
 View of ceiling LED strip lighting
from cargo ramp door to back of room.
 View of the map board and map from inside of the room.
 View of the Operations Room from just outside of the cargo ramp door.
This was a great project!
I learned a lot about LED strip lighting,
especially regarding how it can be used
on/in a 12 volt DC camper-RV application.
And I want to thank FlexFireLEDs.com for
the opportunity and for the terrific results!