
Camper RV LED Strip Lighting Install
LED strip light install in a 2010 Keystone
Outback Travel Trailer Camper RV, Page 1
Click on any image for a larger view.
Every pic is explained below the relevant picture.
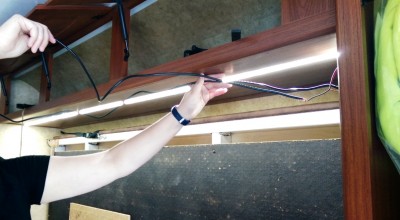
I cut the LED light strip on the correct mark, made sure the adhesive was holding tightly, and tested the light strip.
THE DELIMA:
A NEED FOR BRIGHT ENERGY
EFFICIENT INTERIOR RV LIGHTING
LED bulbs or incandescent bulbs?
My travel trailer needed better 12 volt DC interior lighting.
I needed the lighting to be not just good, but great.
As close to daylight as I could get.
And I needed the lighting to be easy on the battery supply.

Incandescent bulbs were replaced with these LED bulbs.
I changed out all of the 18 interior hot energy-eating
incandescent bulbs with cool low-energy LED bulbs.
This dropped my RV battery power consumption
from 4.86 amps to about 1 amp.
My review of these LED bulbs is coming soon.
This helped, but not so well in the cargo bay area.
The purpose of my Keystone Travel Trailer is strictly business.
I need to be self contained and self sufficient while
on or off the road while fulfilling my photo,
video, prospecting, and mining ventures.
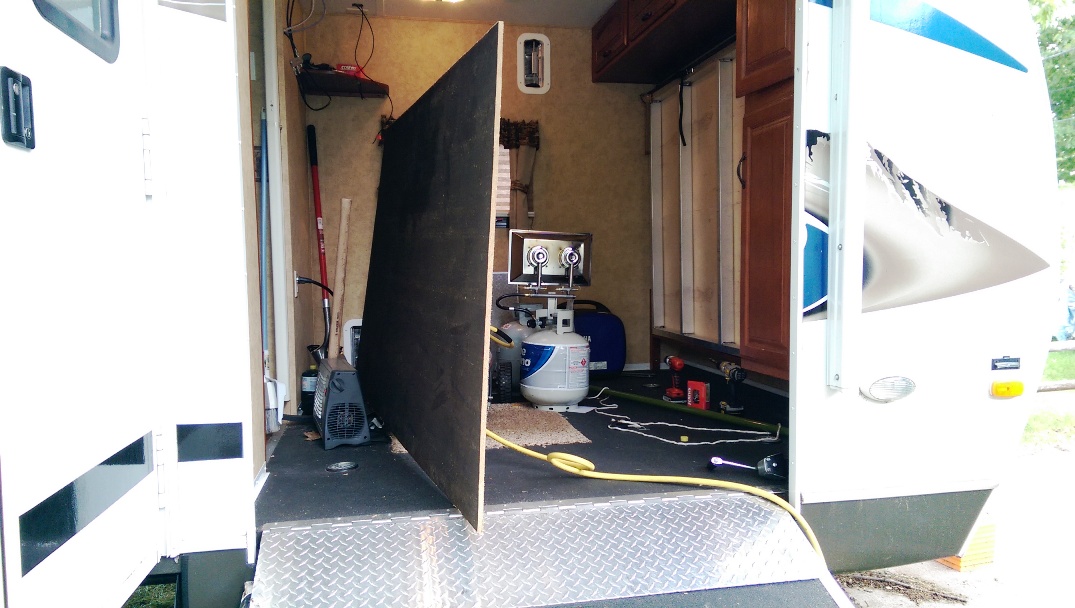
The Keystone has a front cargo bay with a ramped door, and my intent
is to use this cargo bay for not only carrying cargo, but also as
an “operations room” while out on the road and while in the field.
Keystone Outback camper/RV queen bed folds up against the wall.
So began the mod planning of this section of the travel trailer.
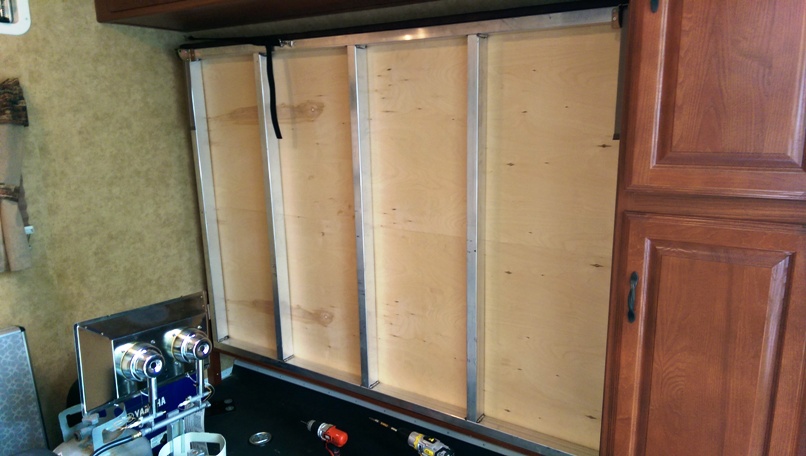
The cargo bay functions as a sleeping area.
It has a queen size bed that folds up to the wall.
The bottom of this bed has an aluminum frame.
My idea was to screw some plywood onto this frame
and use that plywood as a base for a map board.
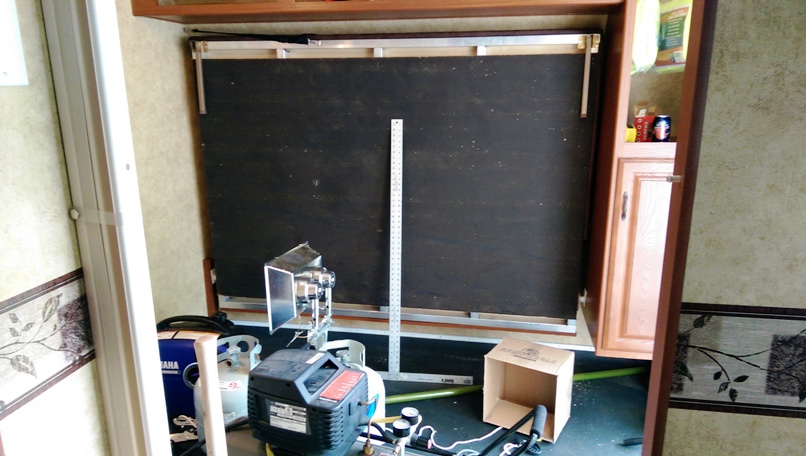
3/8 inch plywood with black water resistant covering.

Pole barn screws used to secure plywood to aluminum bed frame. These have a rubber washer at the head for a nicely tight fit to the wood, less screw head damage.
Plywood installed, before deciding to paint it white. That’s a 4 foot square you see.
This went well, but I soon realized that the map board needed
better lighting, especially since the board itself was black.
(It has a tar paper type of coating on it which
I thought would better help hold the stick pins).
So I began researching LED lighting solutions.
THE SOLUTION: LED STRIP LIGHTING
I came across FlexFireLEDs.com and reviewed
their various different lighting solutions.
Other than different lighting temperature degrees,
I thought that all LEDs were basically created equal.
I soon learned that that is not so.
Their website is VERY informative!
I learned that they have more LEDs
per foot than most other manufacturers.
They tell of their LED color temperatures.
They tell of the lumens (brightness).
The strips can be bent up to 90 degrees.
I decided on the “Colorbright™ Natural White”.
See my review for this LED strip lighting.
THE PROJECT:
And so the project continues.
What was to turn into one project, fabricating a map board, is now
two, both the map board AND the LED strip lighting installation.
Click here for page 2 of this article.
Pingback: Travel Trailer LED Light Strip Installation Completed - Explore With Don!
Pingback: LED Strip Lighting Review